
On a trip to Swellendam earlier this year, I visited the great Drodsty Museum in the town. I was delighted to find that the museum holds a number of artifacts and displays for the Battle of Blaauwberg, including the copy of the painting shown in the picture above. I mentioned to the ladies at the museum that Swellendam is significant in the events of the battle, due to local militia who rode to Cape Town and played a major role in the defence of the Cape. As the museum was looking to upgrade the displays, I mentioned that I would give them a narrative to go with the painting, to describe the events depicted. Below is the narrative for benefit of the followers of this website.
The above painting (copyright Iziko Museums) is the only recognised interpretation of the events of the morning of 8th January 1806. It is painted in a military style showing specific events of the battle detailing important aspects of the advance by the British forces and defensive actions by the Batavians.
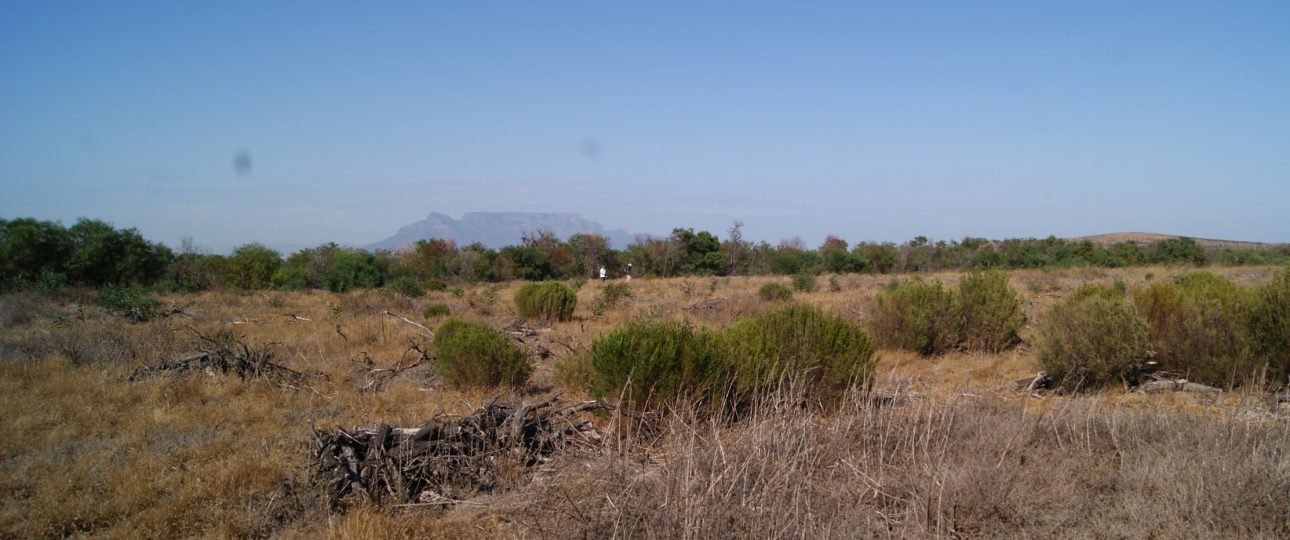
The background locates the scene with Table Mountain in the distance on the far left. Right of centre can be seen the three hills that form the western side of the battlefield. The main hill is Blaauwberg, with Kleinberg on the left and Rondekop on the right. Blaauwberg gives the name to the battle but both Kleinberg and Rondekop play important parts in the events.
On the bottom left the scene shows the Batavian support transport for the 5th Artillery moving up from their overnight camp at Blaauwbergsvallei. Behind the line, caissons with horses are shown waiting, after having brought forward the firing guns located in front of the soldiers. The instructions to these had been to be prepared to withdraw at any moment.
At the very bottom of the painting, and at 45 degrees to the line, are shown the Light Dragoons of the Batavians, mounted and ready to be used to encircle the enemy as part of the plan by Lt-General J W Janssens. The Batavian line from the Dragoons was set out as follows: 9th Battalion of Jagers, 22nd Batavian Regiment, French Mariners, 5th Battalion of Waldeck, Jagers of Waldeck and the Hottentot Light Infantry. In front of the line and behind the centre field cannon can be seen Lt-General Janssens mounted on his horse.
On the left flank of the Batavian line was positioned the Swellendam Dragoons who are shown on the painting riding off towards Kleinberg. They are following a field cannon, ordered off by Janssens to engage a company of the British 24th regiment which had peeled off and were attempting to take Kleinberg. The Swellendam Dragoons met the 24th regiment at the top of the hill and this became the initial encounter of the Battle.
The right side of the painting shows the advance of the British regiments in their two brigades as ordered by Lt-General Sir David Baird, who was commanding from the top of Rondekop on the far right of the picture. The British first brigade, comprising of the 59th, 83rd and 24th regiments, had advanced through the saddle between Blaauwberg and Rondekop but were forced to move in echelon due to sand dunes. This is shown correctly on the painting with the three regiments in three single lines, each with their regimental colours flying in the centre.
The Second brigade was made up of three Highland regiments the 93rd, 71st and 72nd. These had advanced along the main wagon path towards Blaauwbergsvallie and, due to the funnel shape of the battlefield, had been forced into a single column. These are shown as a block of soldiers seven men deep, with their three regimental colours flying in the centre. The scene is set at the point of the front ranks of the Highlanders about to fire a single volley before charging towards the defending line of Batavians. Out of picture is the Batavian 5th Artillery under, command of Lieutenant Pellegrini, who would have been in position of where this painting was probably first sketched. Historian Ian van Oordt conducted extensive research on the picture and has concluded that the original artist could well be Pellegrini.
If you are visiting Swellendam be sure to spend some time at the Drodsty Museum: the history if the area is definitely amazing.